Windows
How to Set Up Windows Hello
Windows Hello is a biometric authentication function available with Windows 11 and Windows 10. You can use a monitor with a camera that supports Windows Hello to sign in to your computer and log in to various apps without a password.
Hardware Preparation
-
Connect the Windows Hello compatible EIZO monitor and the computer with a signal cable and a USB cable.
No additional USB cable is required when connecting with a USB Type-C cable. - Turn on the EIZO monitor.
- Turn on the computer.
-
Open the privacy shutter.

How to set up for signing in with Windows Hello facial recognition
Windows 11
Set up for signing in with Windows Hello facial recognition
The menu displayed may differ from below depending on the Windows version.
-
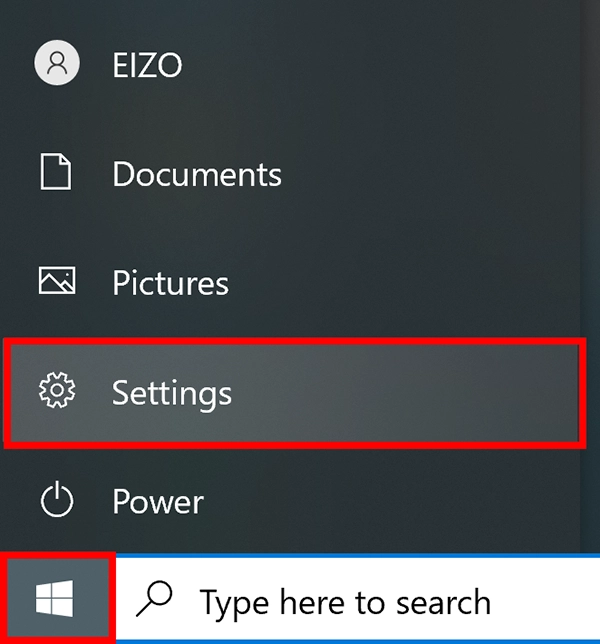
Click the Start button at the bottom of the screen and click Settings.

-
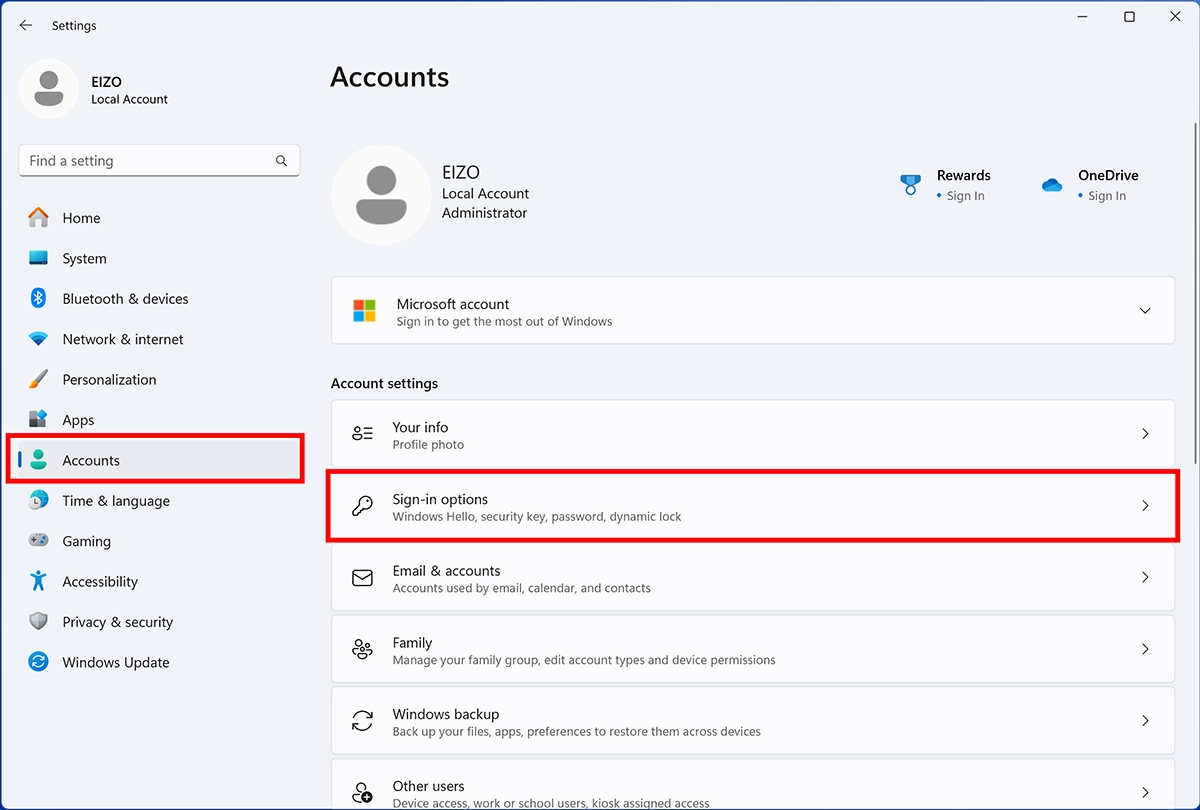
Click Accounts and then click Sign-in options under Account settings.
-
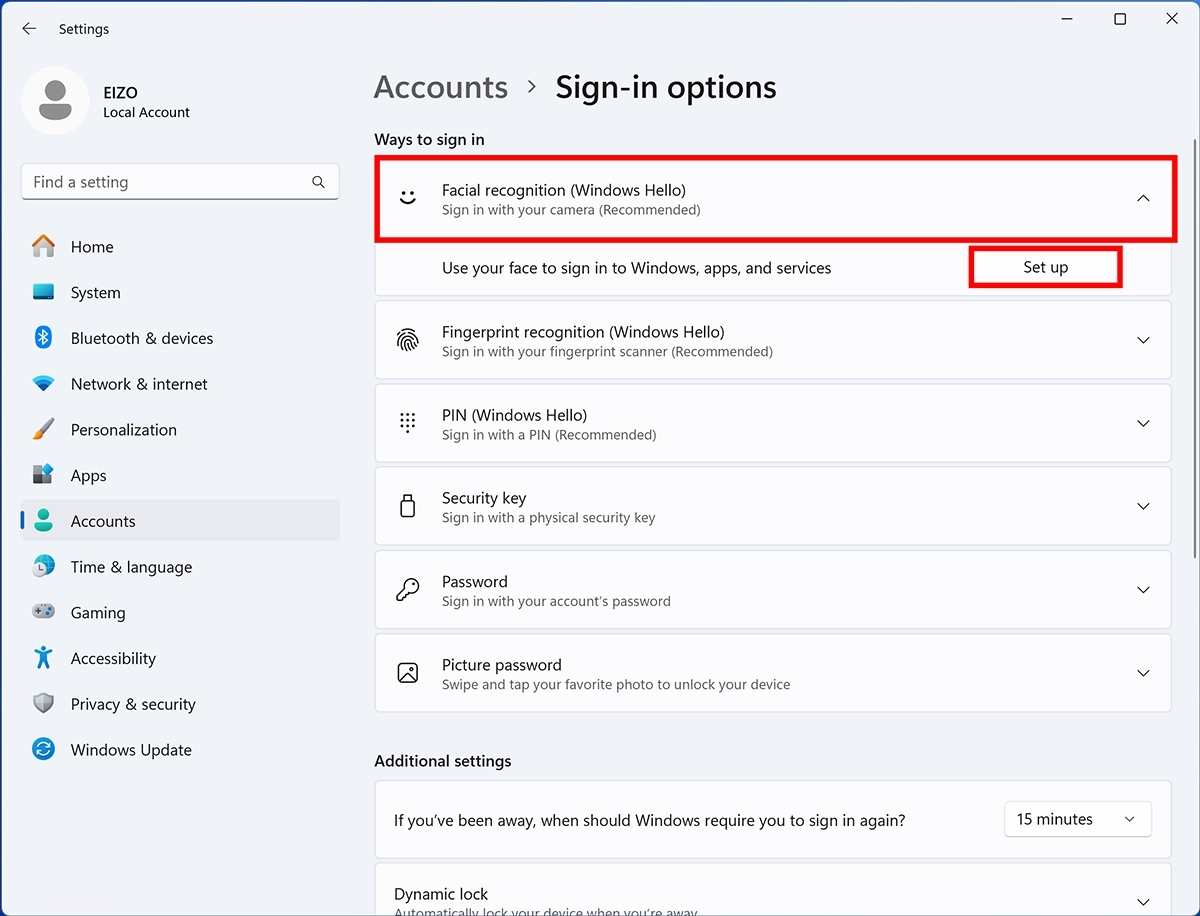
Click Facial recognition (Windows Hello) to expand the list and click Set up.
If the message “This option is currently unavailable” appears, your organization may have restricted sign-in options. Contact your system administrator.
-
When the Windows Hello setup window appears, make sure that the privacy shutter is open and click Get started.

-
As the webcam image appears on the screen, adjust the position and orientation of the monitor so that your face is in the center of the frame. Keep looking directly at the camera until the screen changes.

(If the PIN is already set, skip to step 9.)
-
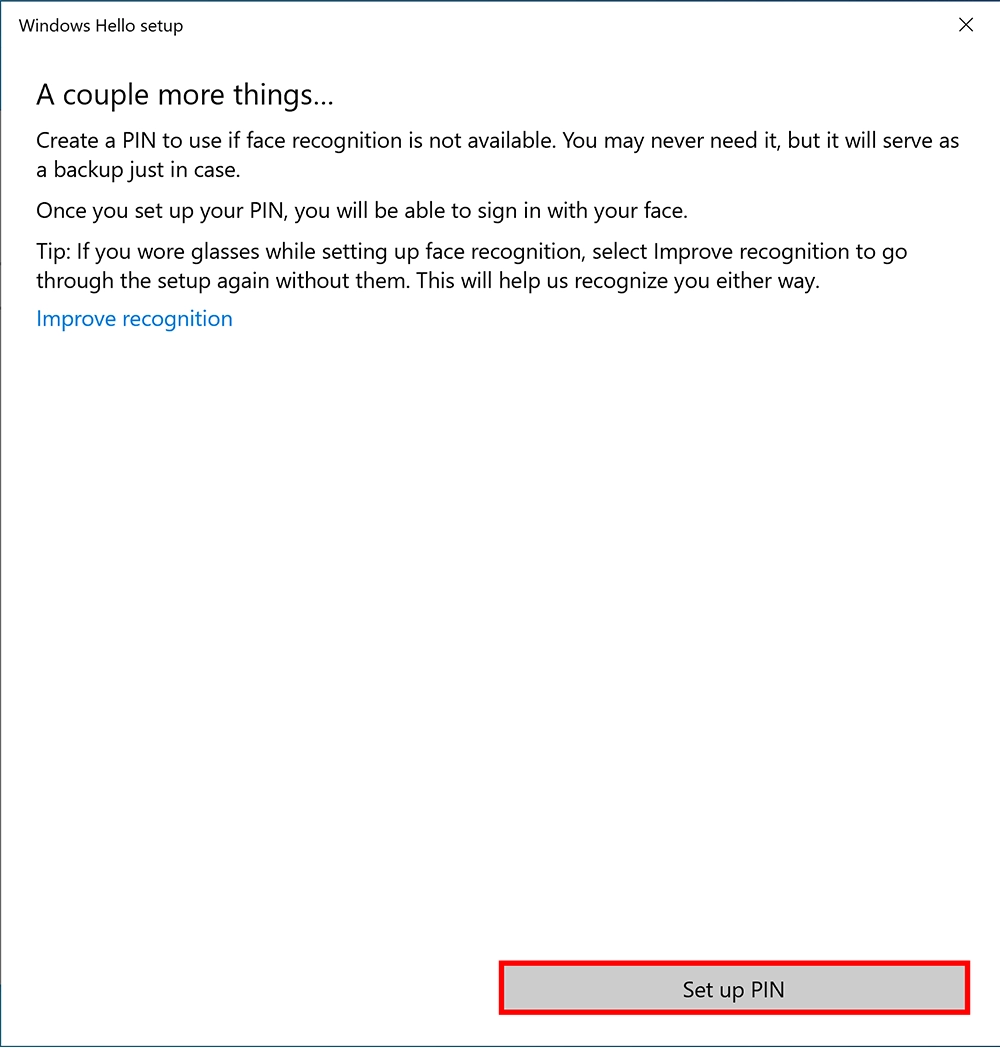
Click Set up PIN.
A PIN is a series of numbers, or a combination of letters and numbers used to sign in to a Windows device. A PIN can be any number or letter.

-
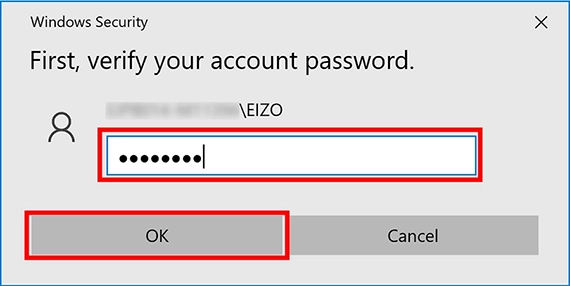
When the Windows Security window appears, enter the password for the user account and click OK.

-
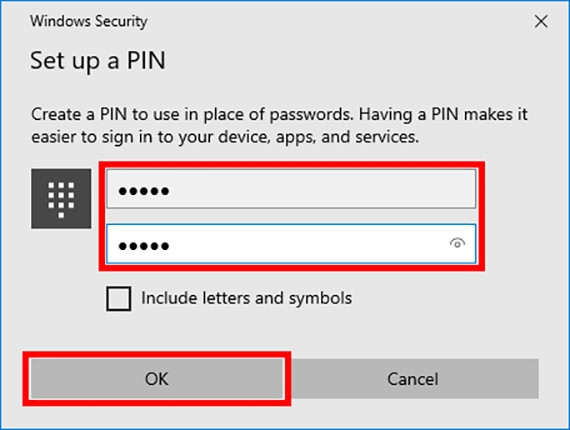
When you are prompted to set up the PIN, enter any number and click OK.
If you check Include letters and symbols, you can set letters and symbols as your PIN.
The PIN will be required if you are unable to sign in using Windows Hello. Please make note of it.

-
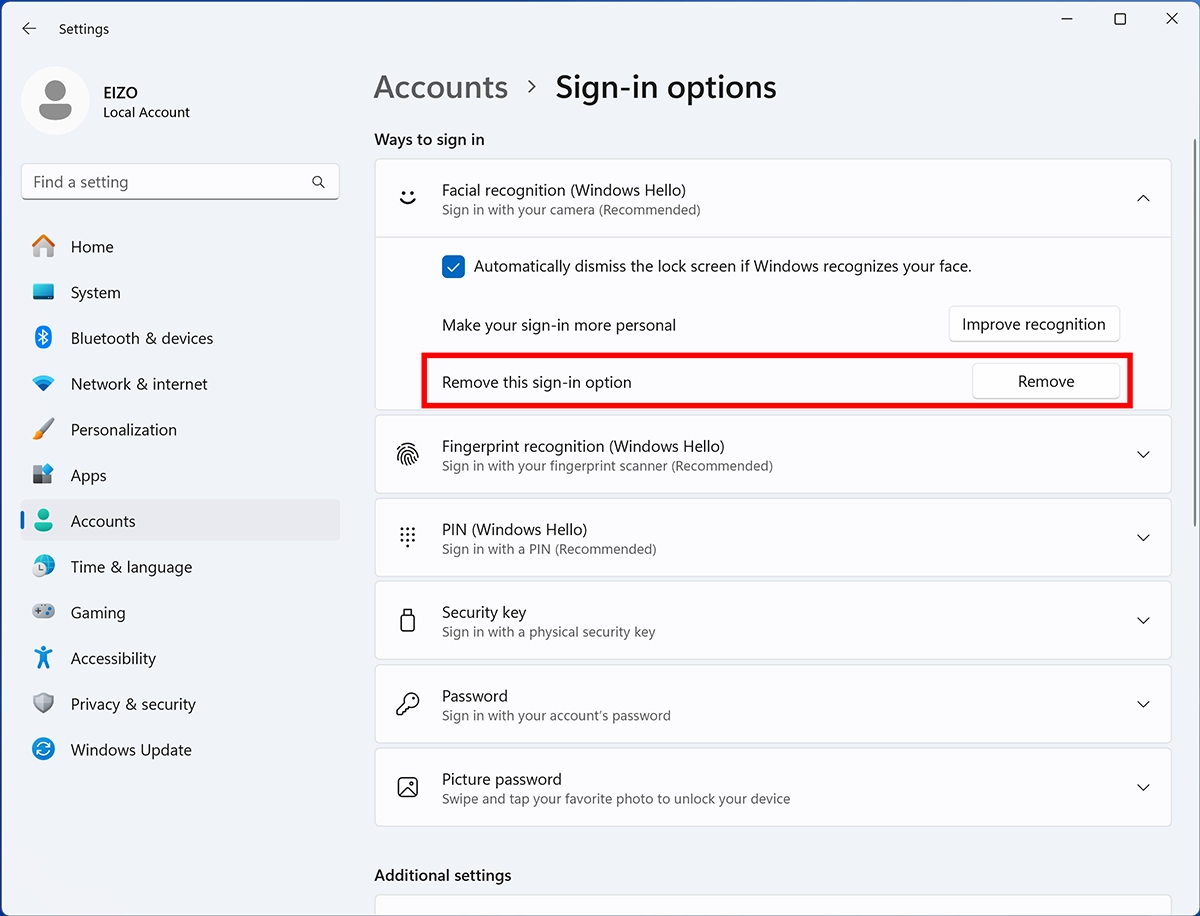
If the Remove this sign-in option appears under Facial recognition (Windows Hello) in Settings, the Windows Hello settings have been completed.
How to sing in
-
When the lock screen appears, make sure the privacy shutter is open and look directly at the camera.
-
Once your face is recognized and authenticated, you will see the Windows Hello logo and the message “Welcome back, <user>
! Dismiss the lock screen to sign back into Windows.”
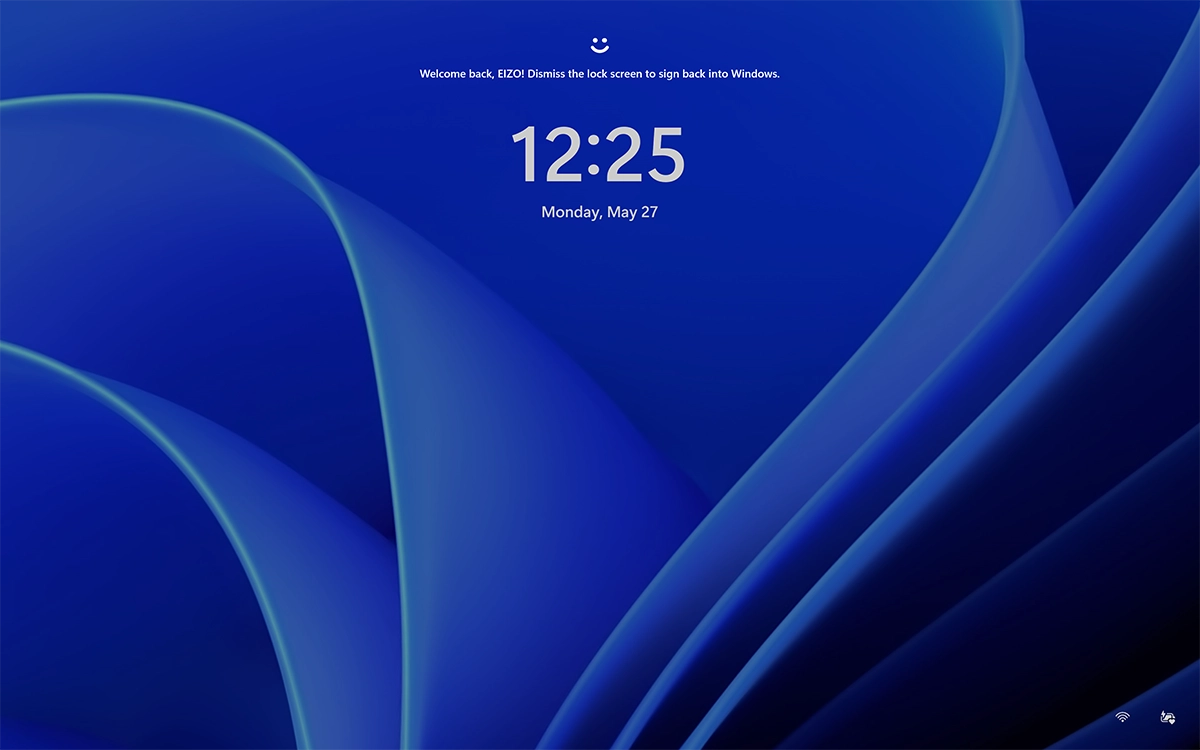
- Press Enter or click anywhere to display the desktop.
Remove Windows Hello facial recognition sign-in
-
Follow steps 1 to 3 in in the Windows Hello facial recognition setup guide to open the Windows Hello settings.
-
Click Remove.

Delete the PIN
-
Follow steps 1 and 2 in the Windows Hello facial recognition setup guide to open the sign-in options settings.
-
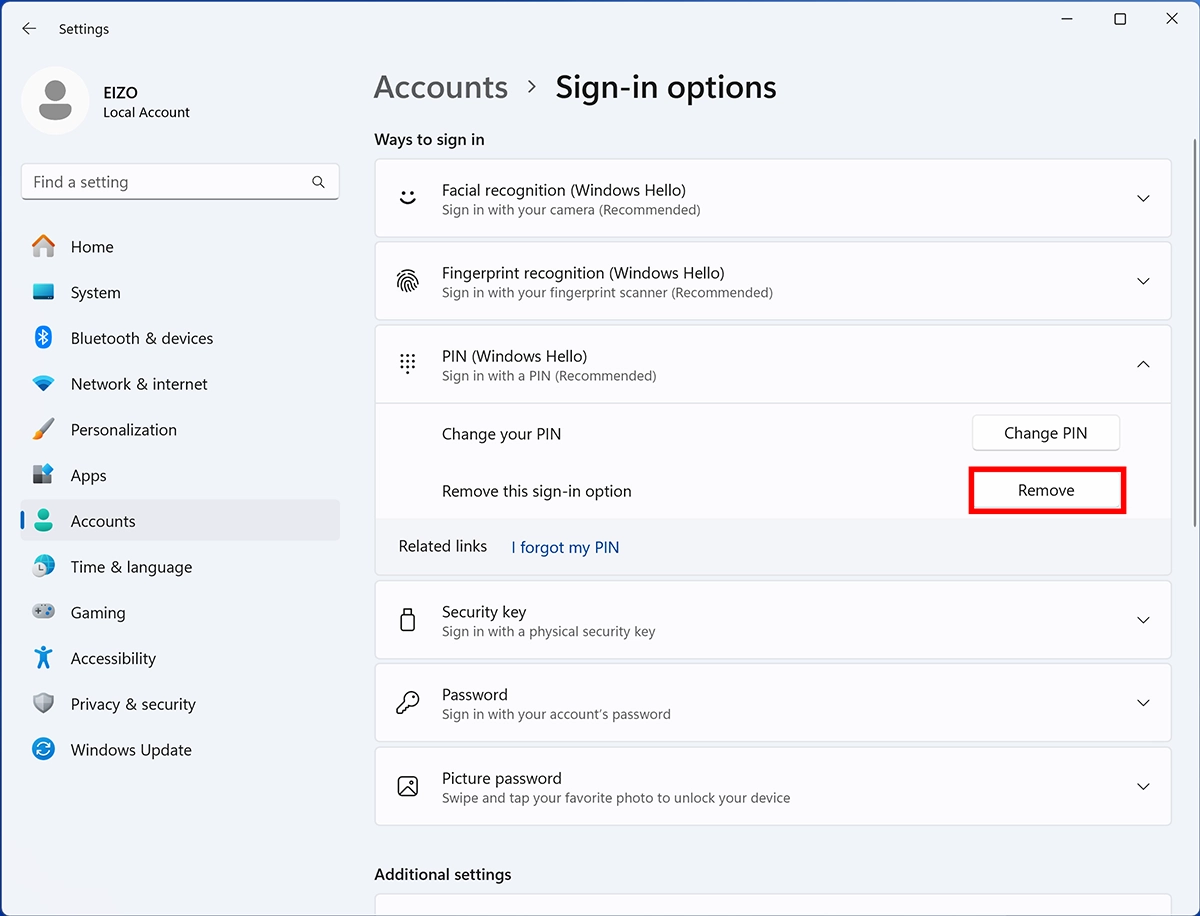
Click PIN (Windows Hello) to expand the list and click Remove.
-
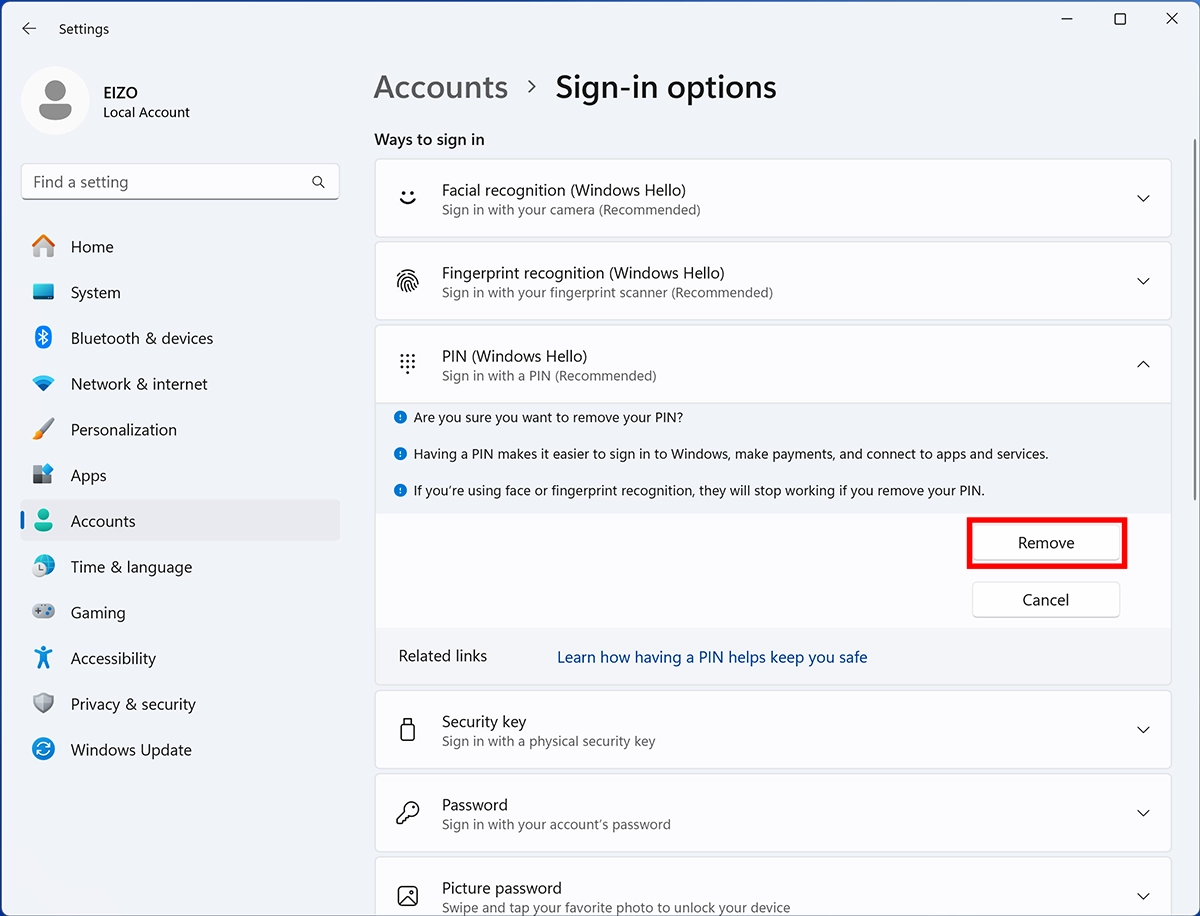
Confirm the text and if there are no issues, click Remove.
-
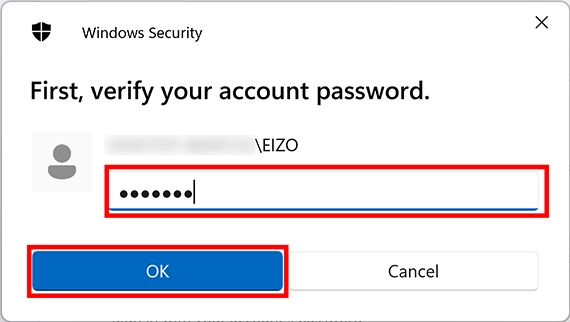
When the Windows Security window appears, enter the password for the user account and click OK.
Windows 10
Set up for signing in with Windows Hello facial recognition
-
Click the Start button at the bottom left of the screen and click Settings.
-
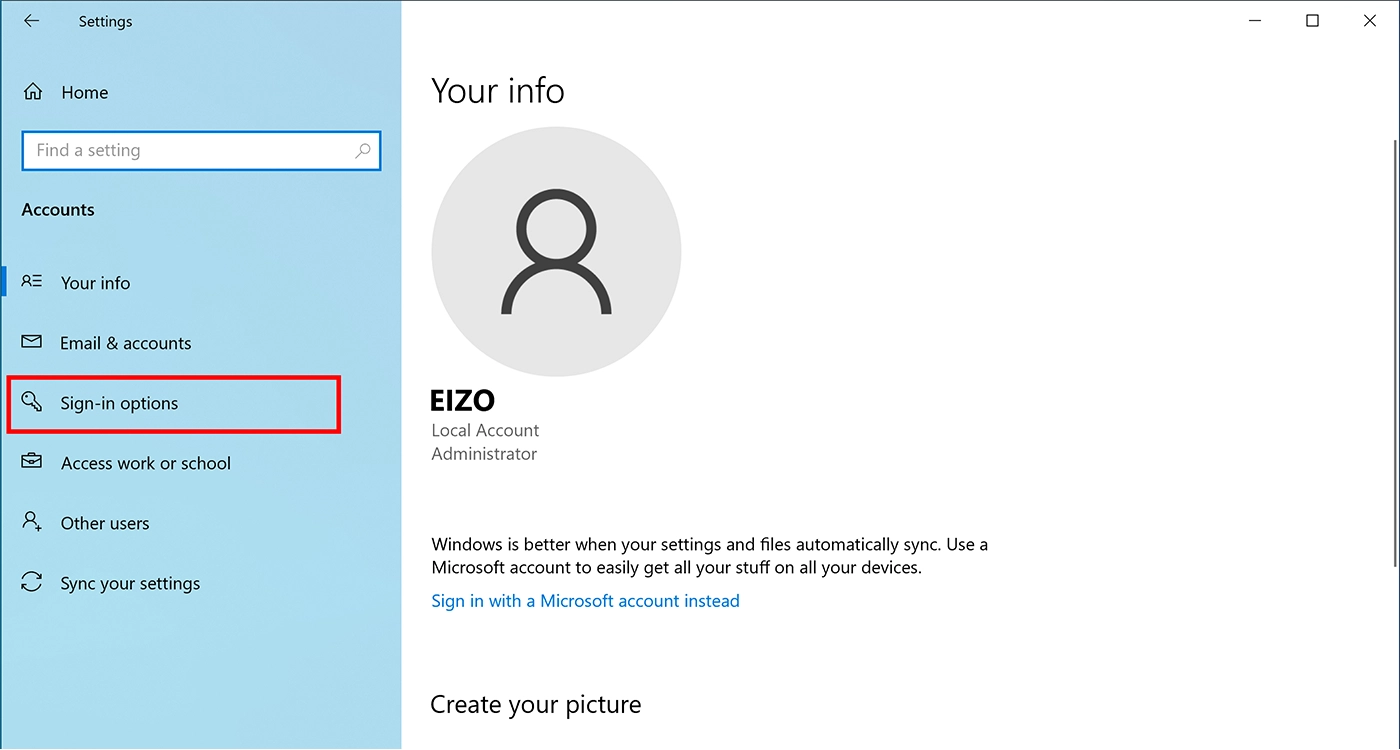
Click Accounts.

-
Click Sign-in options.
-
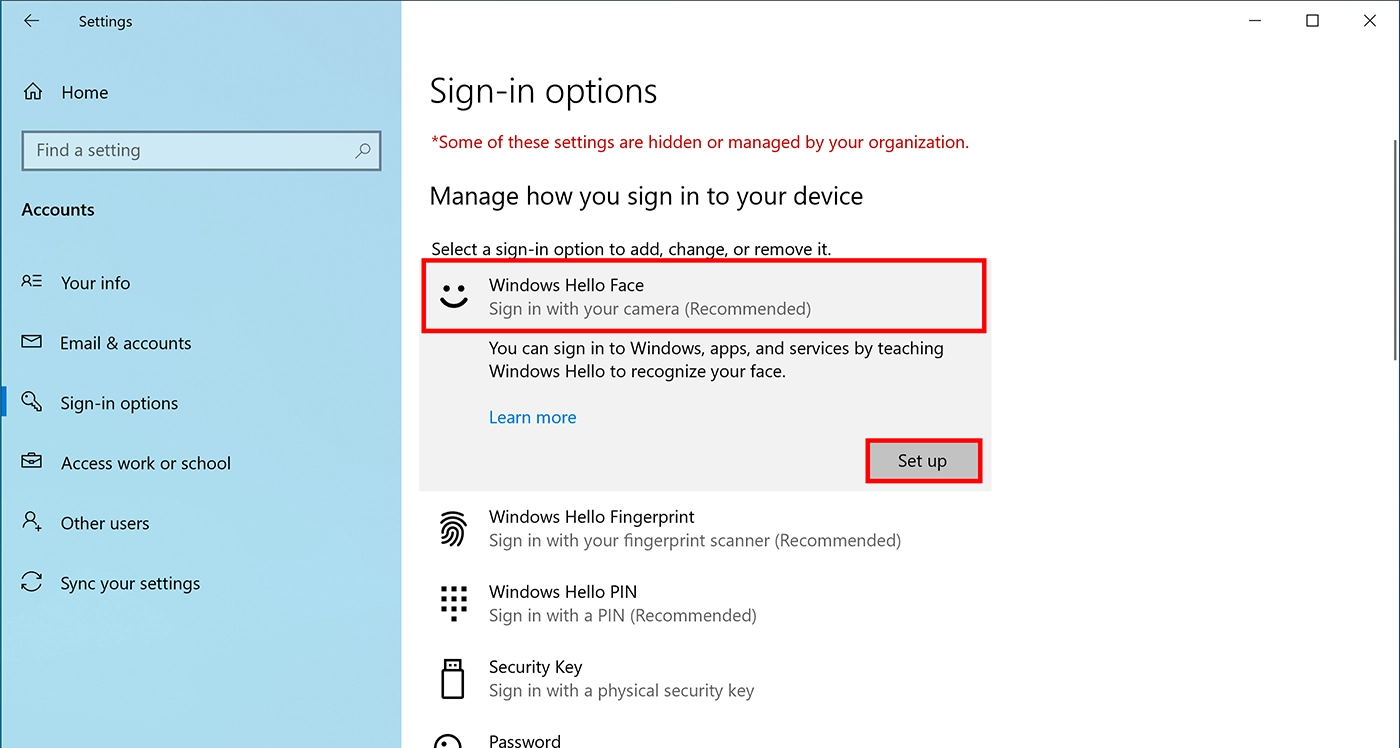
Click Windows Hello Face to expand the list and click Set up.
If the message “This option is currently unavailable” appears, your organization may have restricted sign-in options. Contact your system administrator.
-
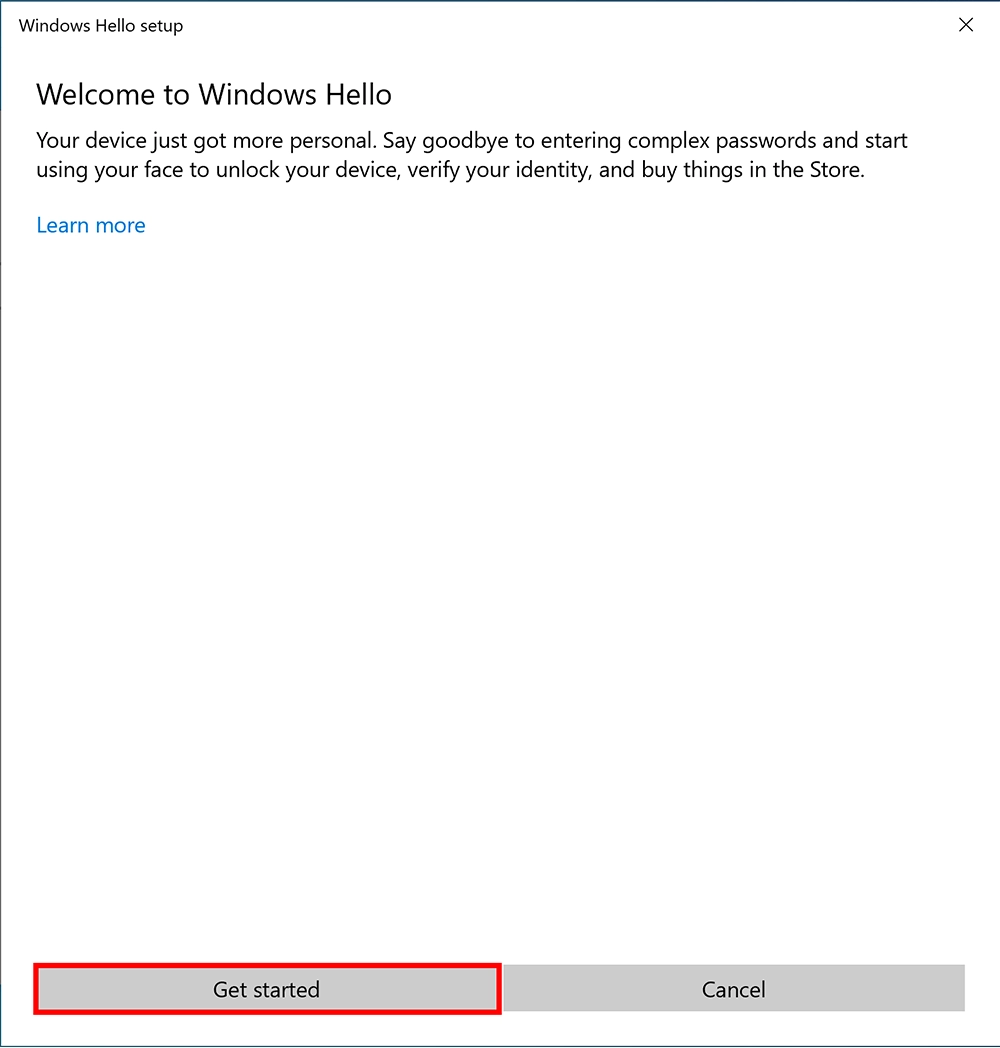
When the Windows Hello setup window appears, make sure that the privacy shutter is open and click Get started.
-
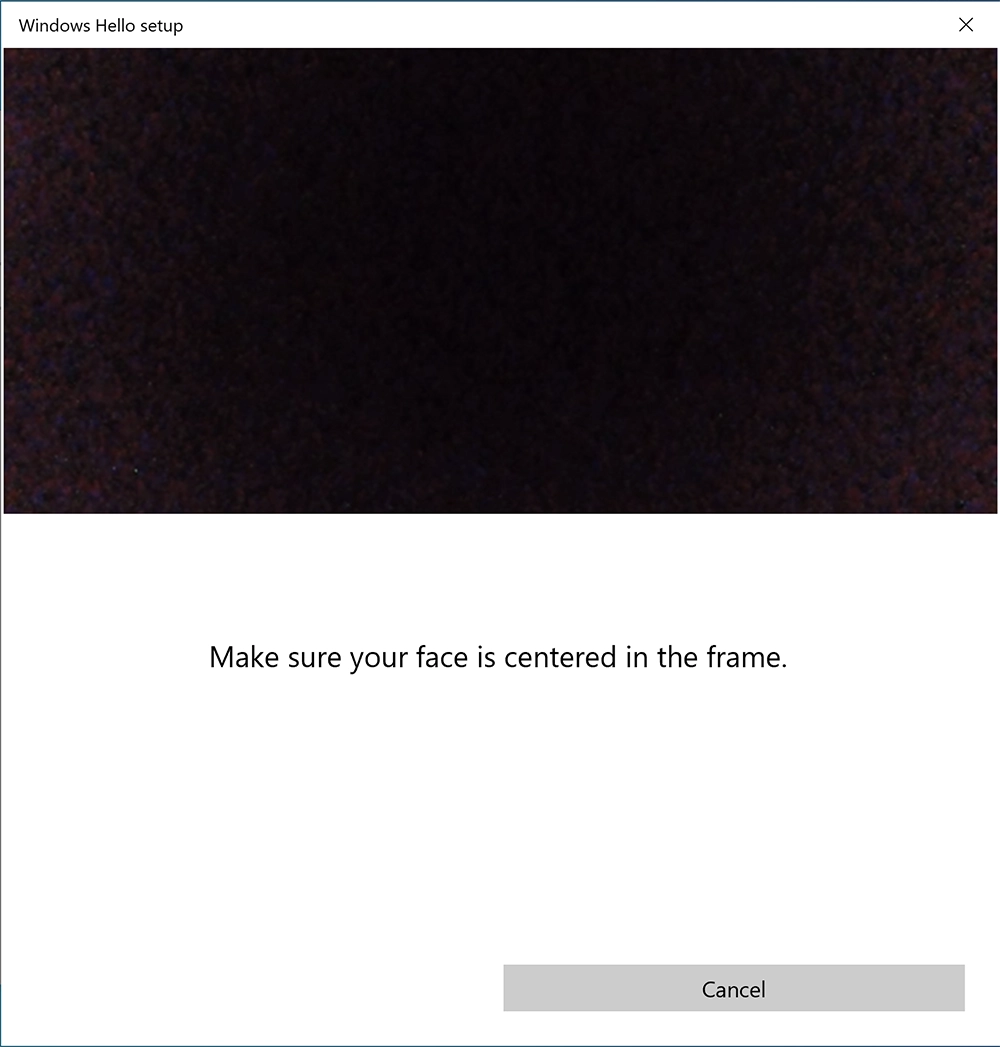
As the webcam image appears on the screen, adjust the position and orientation of the monitor so that your face is in the center of the frame. Keep looking directly at the camera until the screen changes.
(If the PIN is already set, skip to step 10.)
-
Click Set up PIN.
A PIN is a series of numbers, or a combination of letters and numbers used to sign in to a Windows device. A PIN can be any number or letter.
-
When the Windows Security window appears, enter the password for the user account and click OK.
-
When you are prompted to set up the PIN, enter any number and click OK.
If you check Include letters and symbols, you can set letters and symbols as your PIN.
The PIN will be required if you are unable to sign in using Windows Hello. Please make note of it.
-
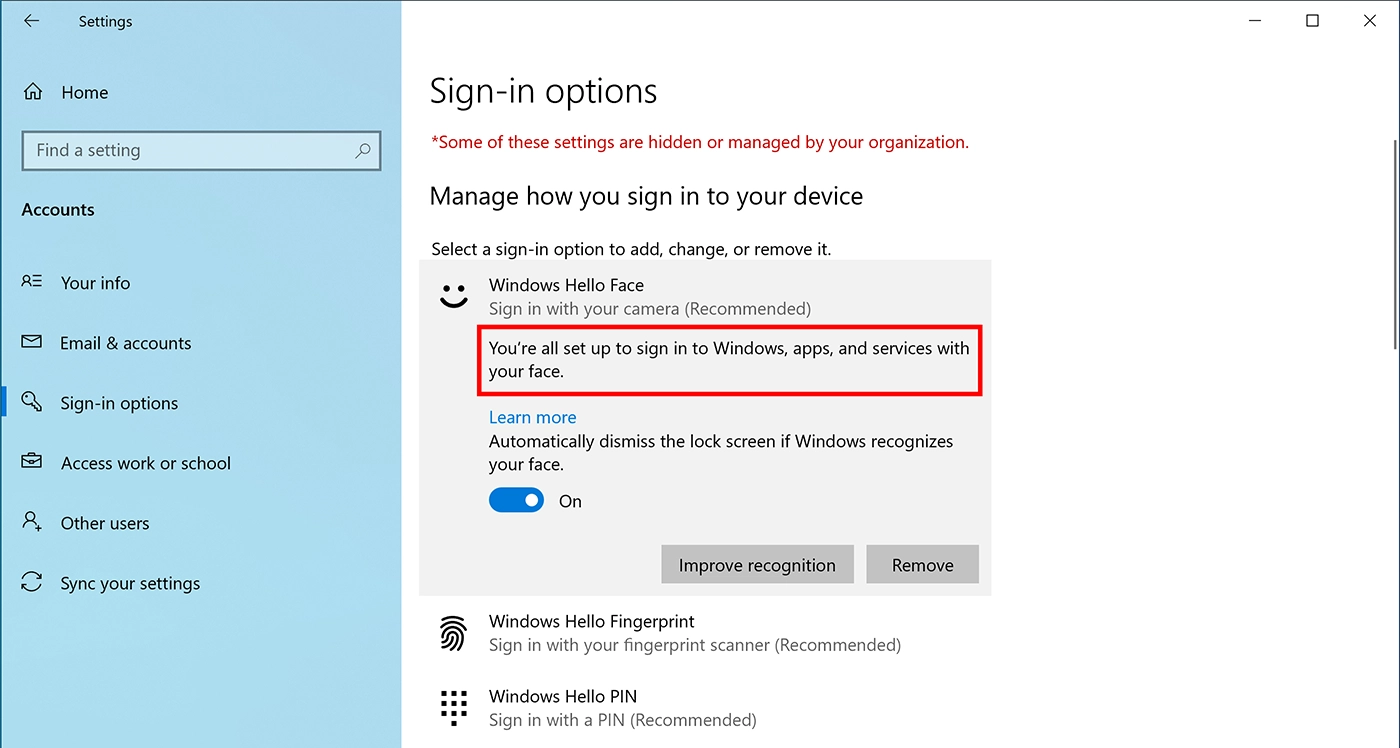
If you see the message “You’re all set up to sign in to Windows, apps, and services with your face.” under Windows Hello Face in Settings, setup is complete.
How to sign in
-
When the lock screen appears, make sure the privacy shutter is open and look directly at the camera.
-
Once your face is recognized and authenticated, you will see the Windows Hello logo and the message “Good evening, <user>
! Dismiss the lock screen to sign back into Windows.”
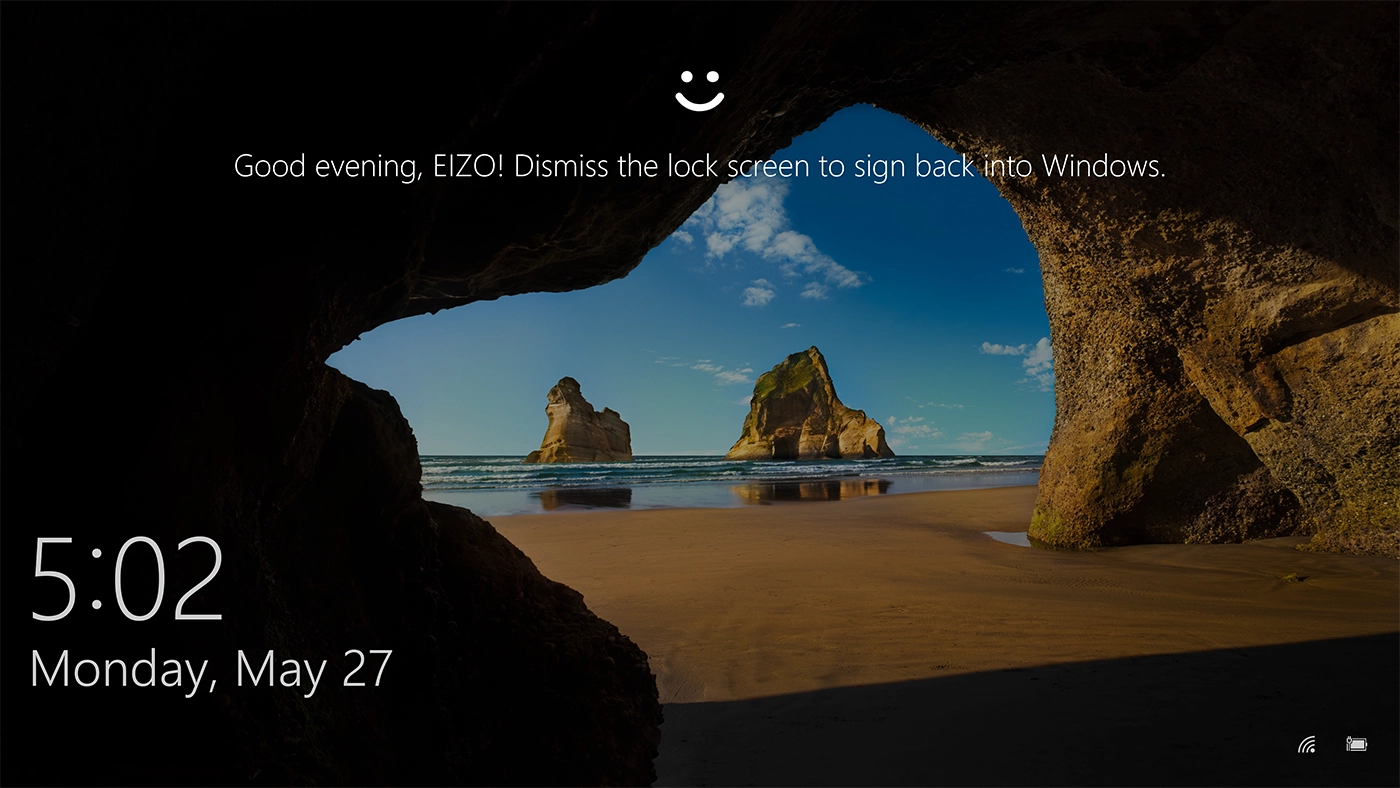
- Press Enter or click anywhere to display the desktop.
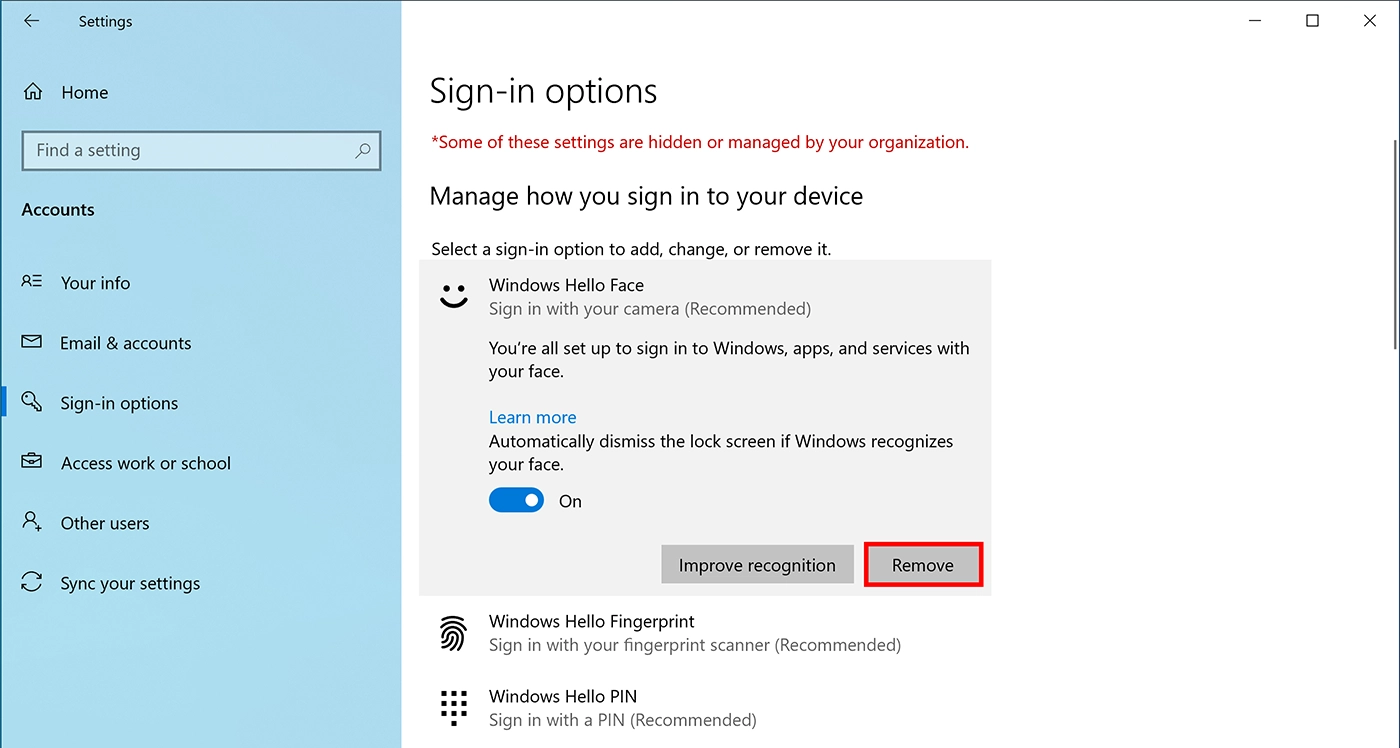
Remove Windows Hello facial recognition sign-in
-
Follow steps 1 to 4 the Windows Hello facial recognition setup guide to open the Windows Hello settings.
-
Click Remove.
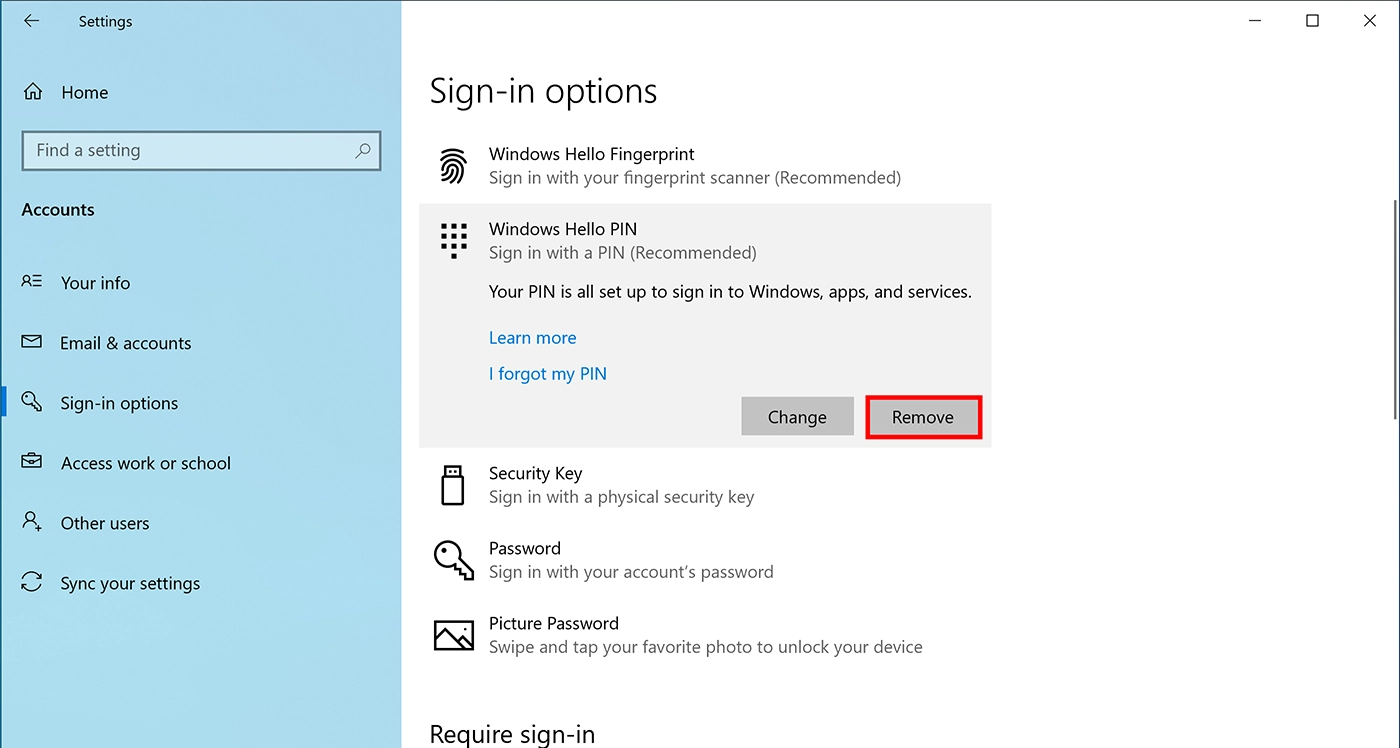
Delete the PIN
-
Follow steps 1 to 3 in the Windows Hello facial recognition setup guide to open the sign-in options.
-
Click Windows Hello PIN to expand the list and click Remove.
-
Confirm the text and if there are no issues, click Remove.

-
When the Windows Security window appears, enter the password for the user account and click OK.
